Building a Niche in a Straw Bale Wall

Sometimes called an alcove or nook, niches refer to small, plastered cutouts in bale walls. They are often used for highlighting the shape of a neighboring window or design feature, or for displaying articles of importance to the homeowners. No matter how they are used, they offer a humble yet dramatic design detail to any building. It’s important to consider whether or not there will be niches in the home before you get too far along in the baling process. Once the wire mesh has been applied to the walls, the creation of a niche becomes more complicated.
It’s often difficult for home owners to decide where to incorporate a niche simply by visualizing their home from a set of plans. It’s a good idea to walk through areas that are fully baled before you apply the interior mesh. This will help you see how the addition of a niche will affect the design of the home.
Creating a Template
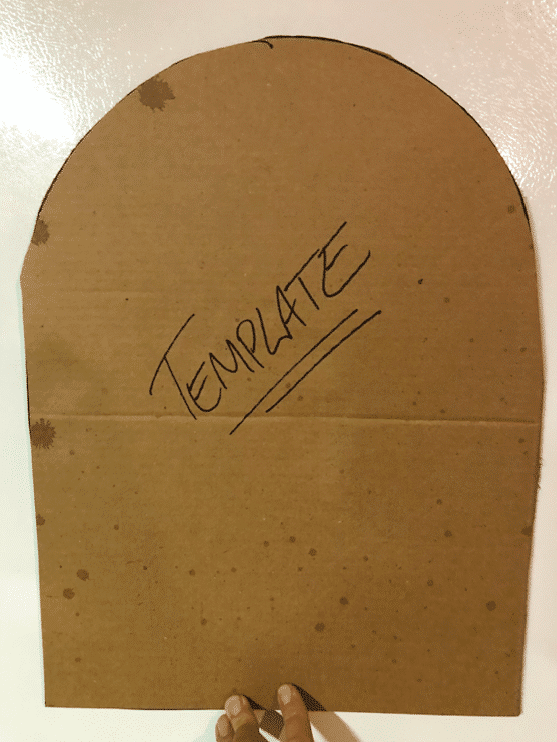
It’s ideal for niches to appear somewhat symmetrical when more than one will be employed in a design, especially when they are placed near each other. A little bit of variation from one to the other is fine; however, a dramatic dissimilarity will appear unprofessional and may draw the wrong kind of attention. To keep the shapes similar, use a template. For every niche I create, I use a piece of scrap cardboard, cut to the desired shape (sort of…more on this in a second). That way, when I move from one location to another, the shape that I start with will always be the same.
The template needs to be bigger than the niche you want on the wall by a magnitude equal to the thickness of the plaster. For example, let’s say you want a 14″ x 23″ niche because it will perfectly frame a specific statue of yours. You will need cut the template at least 16″ x 25″ to account for the roughly 1″ of plaster on each interior wall of the niche. If you don’t, you will actually end up with a niche that measures closer to 12″ x 21″ and your statue won’t fit.
Once the template is made, place it on the wall in the rough location you have chosen. Try to locate the bottom of the niche at the top of a bale (the line created between bale courses). When you cut out the niche, the top of the bale will make for a flat base. Use two 9″ landscape pins to hold the bottom corners of the template in place. A bent pin at the center of the arch (assuming an arched niche) will support the top of the template.
Cutting the Straw
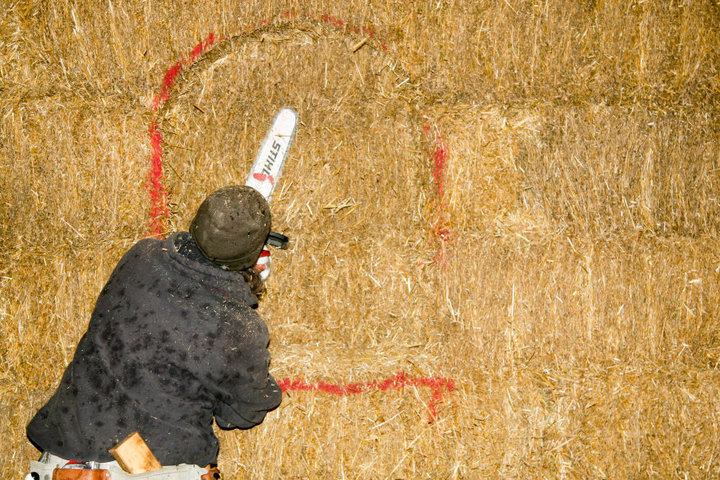
After you have confirmed the location, use spray paint to outline the template. When you remove the template from the wall, the spray paint shows you where to cut. Use a chainsaw to cut out the niche. Be careful not to cut too deep or too shallow. I try to aim for about 6″ deep for the average niche. The depth is not affected the same way the width and height are because there will be equal plaster on both the face of the wall and the back of the niche.
You will hit the strings of the bale. This is normal and will not have a negative impact on the strength of the wall once the house is done. As soon as you feel the “pop”, remove the chainsaw and pull the strings out of the way. This will stop them from getting wrapped around the sprocket of the saw and making a messy tangle.
Mesh and Lath
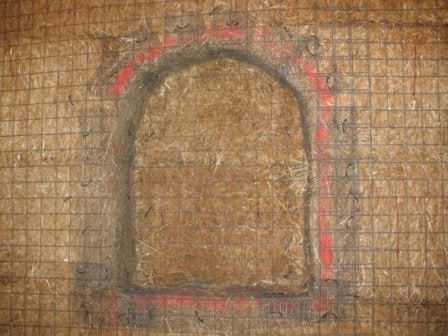
The shape may not be perfect at this point, after all, you are cutting a straw bale with a chainsaw! Once you feel it is “close enough”, move on to meshing the wall. Go right over the niche with the mesh as if it were not there. After the mesh is secured to the wall, cut out the shape of the niche and push that scrap piece of mesh to the back of the opening. Secure it with a few stitches of your sewing. This is both for the strength of the mesh in the niche and the mesh on the outside of your wall.
Use plaster lath around the edges of the niche, starting at the bottom. The lath should extend out from the back of the niche beyond the wall plane by about 6″. Fold this over and pin as needed with 9″ landscape pins. Do the same around the sides and top with one long piece, again extending the lath 6″ beyond the face of the wall. Cut the lath as needed to allow you to fold it flat to the wall. Pin it with landscape pins. You’re ready for plaster!
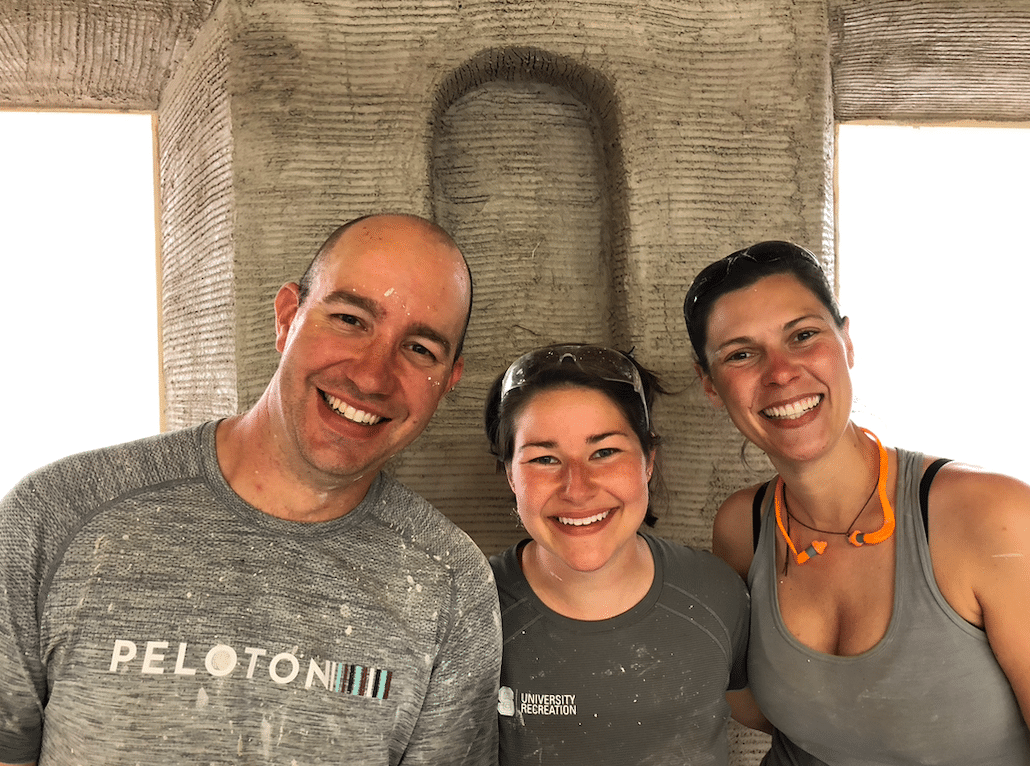
Although they take some time to create, adding a niche to a room creates a beautiful focal point. They highlight the softness of the walls and give the room a special feeling. I remember several years ago when we created a large niche during a workshop. The host said he did NOT want a niche but allowed us to create one solely as a teaching piece. He said he would fill it in before he plastered so we had creative freedom. That niche is still in his wall, and he LOVES it. It totally made the room! I hope you’ll consider adding one (or more) to your project.