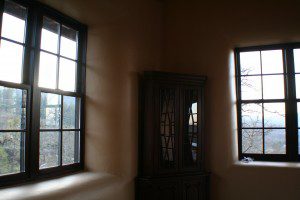
 There is no question that plastered window wells look beautiful; however, the skill it takes to get them to that point may seem out of reach to a novice plasterer. The good news is, it’s not. With a little practice and a good serving of patience, anyone can learn to plaster their window wells to look magnificent.
Perhaps the hardest part of the entire process is getting the plaster to stay put. Gravity has a large say in this process and whenever a novice plasterer tries to apply mud to the top of a window well, often called “the lid” in the industry, gravity usually wins. Below are some tips to beat gravity and create your own beautiful window well.
Proper backing. There is no way for plaster to hang on a wooden box beam above a window or door without some structural help. I prefer to use diamond lath (expanded metal lath and plaster lath are two other common names for this material). It provides a great amount of “tooth” for the plaster to hang onto. Be sure to space it off of the wood by either buying self furring lath of by adding a layer of welded wire mesh underneath it. this allows the plaster to extend through the lath and be held by it, rather than simply laying on top of it.
Check your sand. Be sure that your sand has the proper grits required for lime or earthen plasters (assuming you are using lime or earthen plasters, which I hope you are). I recommend using a sand with a top grot size of approximately 3/16″. You will have to be sure that your lath will allow for such size grains to pass through. If it won’t, then be sure that the remaining grit sizes can so that you can achieve proper penetration of the lath for maximum bite.
Start thin. There is a desire to add a bunch of mud to the wall at once in order to speed things up. This works well on vertical surfaces, but not on the underside of a window or dell well. This is where gravity wins the battle every time. Instead, start by applying a thin layer of plaster to the surface and really work it into the lath on the horizontal surface and the mesh/straw on the curve.
Work it baby! When I teach my workshops, I see the same approach to plastering the curved headers of windows and doors every time. People assume that they need to be gentle with the plaster application because the mud keeps falling off of the wall/lid. The opposite is in fact true. You want to work the plaster into the lath and the mesh on the curves with a LOT of force. Turn your trowel perpendicular to the curve and press as hard as you can while you move your trowel back and forth across the curve. Much of the mud will fall, but some will stay. That which stays will be very well anchored into the straw and/or lath.
Now add your bulking material. Once the plaster has had a chance to hang on tight, you can add a little more for thickness. You don’t need a ton, but a little more may be necessary than what you started with. Be careful at this point, but still be sure to anchor it well to your existing coat.
If you hate the idea of plastering overhead, you can always go with exposed lintels above each opening. These are beautiful when done properly. My favorite was a house with “live edge” walnut slabs, each about 8″ thick. the bales sat on top of the walnut and the plaster dove straight into the top of the wood. Beautiful.


8 Responses
Thanks for the great advice…. Just built a small studio strawbale house in the south west of Western Australia and did I have trouble – it taught me a whole new world about being patient, and found small amounts of render at a time was the key. Cheers and still love reading your blogs Andrew.
Cheers
Wal
Thanks Wally! Congratulations on your studio…
Oh my gosh…….this is soooo true! I have found that throwing it, as well as one can throw upside down, against the lath helps. Once I have thrown up :)) enough to make a thin coat I work it in with force but also with a certain amount of rhythm.
I agree. I also noticed that the wetness mattered a lot to my success or failure. It was a great lesson in patience and wondering if the amount of windows was a good idea. Now all I have to do is the finish plaster. Thanks Andrew for all of the great ideas.
Great site.
thanks for all information.
I am living in the Netherlands
Are there some contacts and adresses in my country
Regards Christien
Hi Christien. Please check out the folks at this link for contacts in the Netherlands. I don’t have any direct contacts there personally.
How is lath installed around electrical outlets and lights on interior walls?
Thanks
Hi Nathan. I use a system that employs plywood plates to attach the boxes to the walls and those plates provide nailing for the lath. You can find more, with photos, on the site under electrical work…