3 Key Takeaways to Building Your Plastering Skills
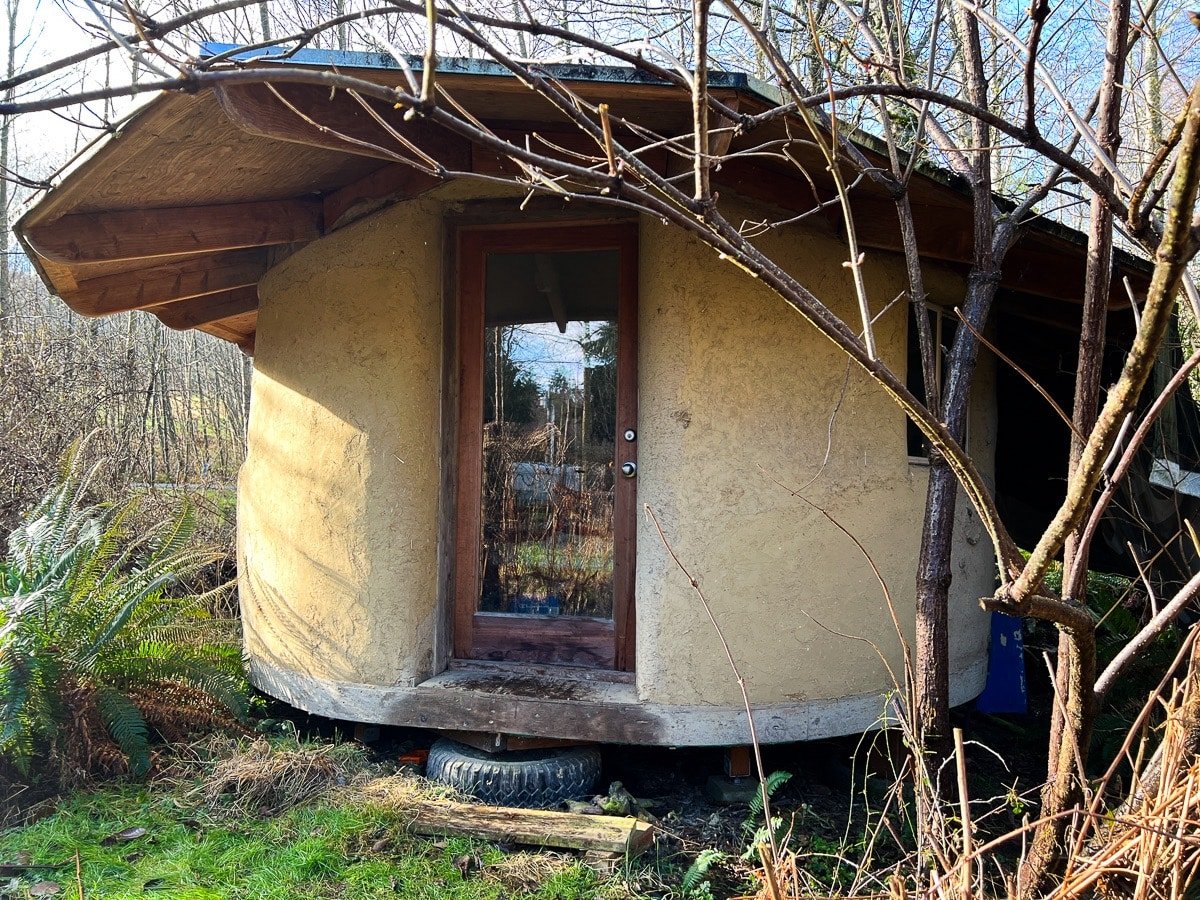
James Henderson weaves nature into architecture with this cozy straw, clay, and wood cottage.
What happens when you bring together 60 natural plastering professionals armed with the latest plaster recipes and set them against the backdrop of the Olympic Peninsula?
It's more than just a gathering of mud enthusiasts; it's the Natural Plasterers Guild Retreat, a week-long celebration of creativity, craftsmanship, and community that I had the privilage to attend recently.
This retreat wasn't just about showcasing expertise—it was an opportunity for professionals to delve into the foundational art and science of natural plastering. Attendees had the chance to explore the myriad ways materials can be combined and applied, highlighting our shared deep understanding, dedication, and passion for the materials that unite us.
Amidst the expert displays and camaraderie, for me, the retreat also prompted reflection on the beginning of any Plasterer's journey.
Here are three key takeaways to building your plastering skills and to support your ventures into natural plastering and straw bale home construction:

James Henderson from NW Natural Homes spills the secrets on crack-free perfection.
1. Simplicity is Key
Plaster, at its core, is a protective layer for your walls. When starting, opt for a proven plaster system that aligns with your substrate and climate.
Keep it simple, reach out to experienced individuals, and learn from their insights. Learn more about lime plastering for straw bale building.

A collection of Japanese trowels, each a testament to precision and craftsmanship.
2. Tools and Techniques
The basics matter more than the bells and whistles. While the guild showcased a plethora of snazzy tools and techniques from around the world, plaster applications need not be overly complex.
Success lies in the tool or technique’s capacity to ensure solid plaster adherence, durability, and moisture protection. That’s it. See examples of plaster tools on our Workshop Host Tool List.

Rebecca Gilling and Cat Odell showcase their sculpting skills in a hands-on clay demonstration.
3. Beauty in Imperfection

PNW Evergreen Old growth Forest
Becoming a skilled plasterer takes time. Building muscle memory and experimenting with textures are part of the journey. Embrace the learning curve.
Every expert at the Natural Plasterers Guild started with zero skill and, with time, now makes plaster application look easy!
The finished product's beauty is worth the effort - and remember, imperfections are a part of the artisan nature of this finish. See examples of different artisan finishes.
As someone who also started at zero skill long ago and has since witnessed the progression of the natural plastering trade over two decades of straw bale construction, I can personally attest to the rewarding nature of this journey.
The camaraderie isn’t reserved for Guild gatherings; it emerges wherever people lean into building as a crew, getting muddy together and creating beauty.
Having transitioned from a contractor to a teacher, I recognize the importance of sharing craft knowledge to ease others’ skill-building journeys. It’s valuable to tap into the experiences of those who came before you, learn from their mistakes and successes, and apply that wisdom to your own projects.
That's why I invite you to join us for hands-on workshops, where you can immerse yourself in plaster mixes, gain confidence in application techniques, and create lasting memories with a community that shares your passion.
In the realm of natural plastering, every journey begins with a single stroke. Embrace the process, connect with fellow enthusiasts, and let's build something beautiful together.
- Timbo
