Shaping Straw Bales for Construction

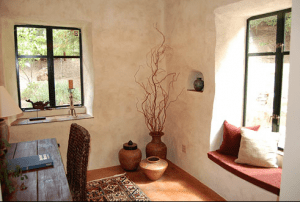
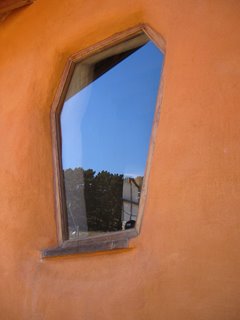
On day one of this E-course, we shared with you about six major reasons that influence people to build with bales. One of those reasons was the beauty of a finished straw bale home. The soft undulations of straw bale walls and the gentle curves into the window and door wells are indeed beautiful, but they are also practical. Around windows and glass doors, curves allow more light to filter into the room by reflecting and bouncing that light off the plaster.
The undulations along the wall lengths help to create the natural feel of the home, something people often struggle to put a name to, but certainly something they notice. Both the undulations in the walls and the curves in and around windows and door wells are relatively easy to produce, and they have a remarkable effect on the aesthetics of the house.
Wall Undulations
Funnily enough, these are not only easy to create but are hard not to. In other words, it takes more work to remove wall undulations than to create them. At every workshop we teach, we show the process of straightening the bales within the walls with a tamper and/or bale persuader and then cleaning up the straightened walls with a string trimmer. During those lessons, we often have a participant or two in the class who worries that the cleaning efforts will ruin the natural undulations of the walls. We always assure them that this is not the case.
Because bales are a natural material and are not all exactly uniform in shape and size, they create undulations, which is precisely what makes straw bale walls so comforting and energetically enjoyable to be around. That said, if you don’t take the time and make an effort to straighten and clean up the walls, the natural beauty of the imperfections may completely overwhelm the shape of the wall. We’ve seen it done by owner-builders more than once. In some cases, they got exactly what they were after, while in others, they spent a lot of money on plaster trying to straighten their unruly walls.
Shaping Curves
Creating curves in the window and door wells is quite simple, especially when using a structural welded wire mesh (which we recommend for most if not all our homes). Simply hold the bales back about 5″ from the interior edge of the rough window jamb (measured from the side facing the window itself) to allow room for loose straw to make the curve. We find it easiest to stop the bales at the edge of the window framing, which in my system happens to be a 4×4 post for the king stud and a 2×4 trimmer stud. This yields 5″ of setback from the interior jamb edge.
Once you have installed the majority of the mesh through the home, it is time to focus on the curves. Be sure to hold the interior pieces of mesh back from the end of the bales at windows and doors by about 5″ so that you can adjust the bales with a chainsaw while creating your curves (if necessary) without risking hitting the mesh. In most cases, no chainsaw adjustment will be needed.
Wire mesh, cut to fit the desired curve, acts as a form for loose straw that is simply stuffed into place to create the desired curve. The loose straw must be packed tightly behind the curving mesh pieces because loose stuffing requires more plaster to fill the voids. After all, the plaster is pushed hard into the walls, and if there is any “give” to the stuffing, that space will quickly eat up a hawk or two of plaster. It’s also a lot easier to plaster against a rigid substrate, so thoroughly filling the curves will speed up your plastering process by simplifying the application. Once you have achieved the shape you are after, pull the mesh tight to the wall and attach it to the existing mesh by bending pieces of the new mesh around the existing.
As alluded to earlier, another way to create curves is to stack the bales tight to the interior edge of the window jamb and then use a chainsaw to cut the edges back. We don’t like this method as much because you risk hitting the windows with the chainsaw, and any cuts you make will likely hit the innermost string on the bale and cut it free. This loosens the bales around each window and door and, in our opinion, makes for a weaker overall structure.
Niches and Nooks


Another advantage of the thick straw bale walls is the ability to create niches or nooks. These little spaces are carved into the walls after the bales have been stacked, straightened, and cleaned up with the string trimmer and are ideal for items you might want to highlight in your home.
A well-placed light fixture can draw attention to these beautiful little alcoves as well. We use a cardboard template to mark the location of our niche on the wall. This speeds up the process and produces uniform shapes from one niche to the next. It also allows us to visually inspect the proposed locations for each niche without actually cutting them into the wall. This is a great idea because the niche location is pretty well determined once cut into the wall!


There are no real limits to what you can do with a niche. The only “rule” we have is regarding the depth of the niche because any hole that is cut into the wall represents a lowering of the R-value in that area. We keep my niche right around 6″ deep. The easiest way to keep track of this is to mark the chainsaw’s bar with bright paint right at 6″. When cutting the niche, simply keep an eye on the paint, and as long as you can see the line, you know you have not cut too deep. Have fun with this part of the build (actually, have fun with the whole build…but you get what we mean). These niches can create beautiful points of interest within the home.