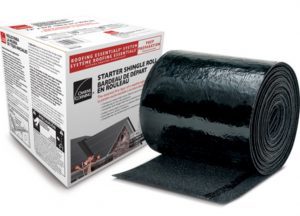
 For years the only way to start a roofing job was to buy some cheap 3 tab roofing shingles, cut off the tabs, and lay the strip as the starter course. This was time consuming and wasteful. As with most corners of the market, someone who had to do this everyday for their living decided to create something better. The answer is the starter shingle course roll (made by Corning). This product speeds installation so much that I can’t believe I ever worked without it. The steps to installing a composition roof are outlined below and the inclusion of the starter shingle roll is a welcome addition in my books.
1. Prepare the deck. Be sure to have all nails set well with the heads flush to the surface of the roof decking. Joints of plywood or OSB should be spaced 1/8″ to allow for minimal expansion without popping joints.
2. Install metal drip edge around the base of the roof line eaves. Extend the drip edge slightly past the side of the roof (rake) to insure water does not drip in behind the metal at the corners.
3. Lay roofing felt from the bottom up. Start at the bottom of the roof and lay the felt across the roof in full runs. Overlap any breaks in the horizontal run by at least two feet. Use a hammer tacker (stapler) to attach the paper to the roof deck. Use only as many staples as needed as each hole is a hole in your waterproofing membrane.
4. Attach metal drip edge to the side rakes over the top of the roofing felt. Extend the drip edge over and beyond the eave drip edge to insure proper drainage.
5. Use roof paper nails on roofing felt that will be exposed for more than a couple days to help hold it in place against winds.
6. Apply the self adhesive starter shingle roll material to the eave of the roof.
7. Apply the self adhesive starter shingle roll material to the rakes of the roof and overlap the material placed at the bottom. Be sure to install the material in items 6 and 7 straight (use a chalk line) because it will be seen from the ground. Overhang the material just slightly per manufacturer recommendations.
8. Attach the first course of shingles in a full piece. Directly above the first piece, attach a second piece with the desired overlap. The second piece will be cut per manufacturer’s recommendations to create the desired offset. Continue to the ridge in the same manner being sure that no two joints line up in the roofing material.
9. Install any roof penetrations and flash them properly with adhesive flashing and roofing shingles.
10. Install a ridge cap and/or ridge vent per manufacturer’s instructions.
11. Have a topping out party! Your roof is on, time to relax a bit!


8 Responses
Thank you Andrew for all your good recommendations. I’m from Argentina and i plan to build one of these houses soon. I´ll keep you posted.
Best regards,
Charlie
Asphalt shingles? Ewwww gross… I realize they’re cheap, but pretty low on the green scale, no? I’ve always said you get what you pay for…
Not everyone can justify a metal roof, but the reflectivity in the summertime of metal over asphalt can seriously shorten the payoff/payback time with lower A/C cooling costs… seems like such a waste to cap off a beatiful green structure with oil.
But that’s my not-so-very humble opinion 😉
Charlie,
I just had a man from Argentina come through my May straw bale workshop. He is very excited about bringing straw bale to Argentina. Hopefully you too are able to build a beautiful bale home!
Matt,
Yup. I agree with you. 🙂 In truth, most people cannot afford anything other than asphalt shingles so I want them to at least do a proper installation so that they last a long time. I personally think metal is a great option but it is very expensive and in some cases, like if you have neighbors above you on a hill, not a good option. The reflective properties of the roof can actually heat up a neighbor’s house tremendously if the siting is poor.
The details of the installation instructions for the asphalt shingles are also similar to that of cedar shake layout and other roofing (underlayment application) including metal, so I believe the post will potentially help lots of folks.
Thanks for speaking your truth about the materials. Good input for sure.
Andrew- At least one of us will be at your workshop in Sept. in NY, since we are building a SB house. Honestly, SB costs more anyway, so the extra expense of metal seems well worth it. I have installed roofs on a farm for years, and now only install metal because they last so much longer. Also, roof leakage is deadly with SB, and metal (when installed properly with roofing screws) just does a better job. Finally, I agree with Matt- we are expecting major payback on heating/cooling with SB, and the metal roof is an important part of that.
Are we ready for $7/gal. gas everybody? Better get ready!
Ted T.
> Are we ready for $7/gal. gas everybody? Better get ready!
Yup. http://www.uiuc.edu/goto/twike... When my wife is outta town like she was last week, the gas car -doesn’t move an inch from our driveway- And I’ve got a 6.5 year old and a 1.5 year old to take back and forth to school/daycare!
Just wish I could get more of ’em 😉 Even at US$14,000 *used* I could sell mine in a heartbeat.
Dreaming of a strawbale house with a 12′ ceiling walk-out/drive-out basement for a Twike factory 😉 Lightweight concrete for the upstairs, and stained concrete basement floor for radiant hot water heat. Someday…
Anybody ever built a passive-haus certified/spec’d Strawbale? The local passive-haus guru uses manufactured materials, and SB has always made a lot more sense to me. The local passive haus homes (redundant, I know) are spec’d for low income, so they are fairly boxy/ugly, however they are very economical.
Hi Andrew,
Thanks for all your good work, your website has provided me with a wealth of information and set me on the track to SB construction. I have started by locating materials, one of which has brought up this question: Can a load bearing SB structure support a terra cotta tile roof?
I’m asking because I have located a large quantity of salvaged roof tiles for next to nothing. The pluses are using recycled materials and they are virtually fireproof….the downside, and my big concern, is the weight.
Thanks again,
Brad
Hi Brad. Thanks for the kind words. Absolutely, the bale walls can support a tile roof. The main place where you’ll need to increase the strength is in the rafters and sheathing. The load of the entire system can be supported by the load bearing walls. That said, I’m not engineer, so I suggest you get a professional opinion about the risks of the heavy roof system. Personally, I think it’s a slam dunk. You’ll want to preload your walls with a lot of weight to make sure they compress fully before you add the roof. Otherwise, with that much weight, you’ll end up with uneven settling.