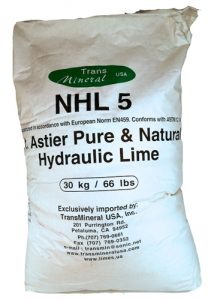
1. Make sure that you wet the walls down before applying fresh material. For the scratch coat, this means spraying the bales before you plaster! I know that sounds nuts after all the talk about keeping your bales dry, but if you don’t do it, the dry bales will suck all of the moisture out of the fresh plaster causing it to dry to fast and crack. For the brown and finish coats, you have to wet the walls down before you plaster but must also wet them down the night before. I think you will be surprised at how much water the walls will take. By wetting the walls down the night before, the “day of” soaking will be more effective.
2. Wind and sun are not your friend when working with NHL. It is crucial that direct sun and wind be kept off of the walls during application and for the following few days as the plaster cures and dries. Hang tarps from the eaves to protect the walls. After you apply the plaster, mist the walls down for a few days to slow down the curing process.
3. There are specific mixing times for NHL. When using NHL 2, 3.5, or 5 and adding your own sand, you must mix the plaster for a minimum of 10 minutes. I prefer to mix for 15-20 minutes for these materials. On the other hand, when using EcoMortar (pre-mixed finish plaster), the material should be mixed for no more than 5 minutes.
4. Be patient. Unlike many conventional finishes, there is a minimal waiting period between coats of NHL plaster. It is imperative that you wait a minimum of 10 days in between coats. Be sure to protect the walls from sun and wind and use a gentle mist several times a day to cure the walls slowly.
5. NHL can be reworked. This is great if and when cracks start showing up in the brown coat. You can refloat the wall or small spots on the wall as cracks show up. This is usually only an option for the first 24 hours or so after initial application. The timing of this reworkability will depend on weather conditions.
Because NHL is a natural product and it does not contain any chemical binders, there is nothing in the material to hold it together other than the lime and sand. If you apply the material properly, you will have a beautiful plaster job. Keep in mind that all plaster cracks and so small cracks will likely appear in the plaster.
The attention to detail during application will help minimize those cracks and will help produce a solid a lasting finish for your bale home. Keep in mind that the structural mesh under the plaster is equally important to a good finish coat. If corners are not reinforced and mesh properly anchored to the building, cracks will occur along those areas regardless of the plaster application process.


18 Responses
Q1 can a dehumidifyer be used to dry out walls
Q2 What causes NHL plaster to pull away from straw bale.
1. It is best to let the plaster dry slowly. In fact, misting the walls to keep them moist is best. A dehumidifier would be the opposite of what you want.
2. If the walls are not properly wet down prior to the plaster application, the plaster can separate from the walls. On the other hand if the walls are too wet (running surface water on the walls) the plaster can separate as well. Finally, if the plaster is not applied properly, for example not pushed into the bales with enough force, it can fall off the walls under its own weight.
is there a more prefered time of year (or even time of day) to be working with this material, i live in the north east and do not have the hot nice weather year round as you might have guessed
The plaster should not be applied when it is below 40 degrees Fahrenheit. The temperature cannot drop below freezing within the 72 hours immediately following the application of the plaster. Dry, hot weather is also difficult for the plaster. It is best to aim for moist, warm days when the air is humid if possible.
I don’t know if this is helpful or what others have experienced… but I’ve noticed that the hairline cracks tend to appear in the second coat where there is a tiny air pocket between the two coats. This can happen if your arms are tired or your tools are not great. So I’ve learned to only plaster for about 3 hours a day – that’s enough for my little arms.
Every time I try to do one more little strip of wall at the end of the day, that’s the spot where I get a few little cracks.
Having said that they seem easily resolved by carving them out in a wedge until there is no evidence of the instability and then wetting and refilling….. it seems to work for us….
We can’t get NHL here in New Zealand. So I’ve used Hydrated Lime which gets soaked in water for at least 36 hours until it forms a lime putty. That seems to work fine.
Anna
where can i get nhl in oklahoma?
whats running bond?
Running bond is the idea of staggering joints when stacking bales. Picture a brick wall or a house made of Legos. Contact Jim at http://www.PALimeWorks.com about the plaster and let him know I sent you. You can use my vendor code to get a discount on your purchase. Once you decide to purchase, contact me and I will give you the code.
follow up to Anna, over- troweling can cause blisters in the plaster coat, blisters are areas that have not made a bond to the previous coat of plaster most likely due to not applying enough trowel pressure in the first place and then troweling over that area again soon after. a film of water has developed between the two plaster coats. these can be scraped back and allow to dry for a few minutes then come back and trowel on fresh plaster. Lime plaster requires a slow set also.
After building an even smaller practice structure, I’m presently building a small straw bale house in Kansas and finishing it with NHL. I’ve found the info on the website and in the DVD to be quite helpful but would like more information on maintenance and repair of the plaster. It seems as though Andrew, Ridge, or Anna may be able to help. For instance.
1. How small a crack in the brown coat should be repaired in the manner described by Anna before applying the finish coat? Are some cracks fine enough to not worry about?
2. How should one go about doing regular maintenance and repair of cracks over the lifetime of the building. (the finish coat is already on at this point of course).
thanks
I try to press back and burnish all of the cracks I see 24 hours after application. After that time, you can’t do much to fight what shows up. Long term maintenance is more about watching for large cracks and repairing them once you feel they risk penetration to the bales. You will get some cracking, but it’s the big ones that are a potential problem. If you have to fix them, you’ll need to lime wash or plaster the entire wall to hide any burn marks from the repair, so it’s not something you’ll want to do often. With proper installation and application, you won’t need to do a lot of repair work.
Hi Anna,
Where did you get your Hydrated Lime from in NZ?
Regards,
I have not built in NZ; however, there are several companies in Australia that sell lime putty.
Anna,
You can get dry bagged hydrated lime from most building supply stores. Pro tip : the Lime available in New Zealand (and Australia) is type N, as opposed to type S – what this means is that you will have to mix up your dry material with water a day or two before you i tend to use it. Ideally two weeks if you can, or two years, the linger you leave it the better it gets, you need to store in a plastic pail with lid and about an inch of water ontop of the mixed up putty. Have a google, there are some good recipes for various plasters out there. You will have to import if you want bagged or bucketed putty here.
Regards
Nigel
Can you use plasterweld on wood lath prior to scratch coat. And, can you use it on all coats prior to next?
I wouldn’t. I prefer to use roofing felt and diamond lath over the wood for a positive reinforcement of the joint. Further, the plaster bonds really well to itself so you wouldn’t need the plasterweld. I imagine it would cut down on the plaster’s breathability, and it would certainly lessen the natural aspect of the plaster. All for no real gain.
Hi. I have seen some brown stains develop on finished lime washed lime plaster over straw bale walls which is difficult to get rid of. It is not clear what’s coming through. The internal wall is clay plastered.
Hi David. It should not be staining from the clay plaster; however, if the interior clay plaster is not significantly thicker than the exterior lime plaster, then there could be overloading of moisture into the walls which is causing them to discolor at the plaster. I would recommend checking the moisture content of the wall in the areas of concern. You can use a moisture meter through the back of an electrical outlet or switch box to see what’s happening inside the wall without causing any damage to the plaster. The other potential point of failure is if the exterior plaster is just a skim coat of lime over clay base coats. Those fail a LOT because of poor bonding and different flexibility rates of the two plasters.