What Happens Between Straw Bales and Plaster?
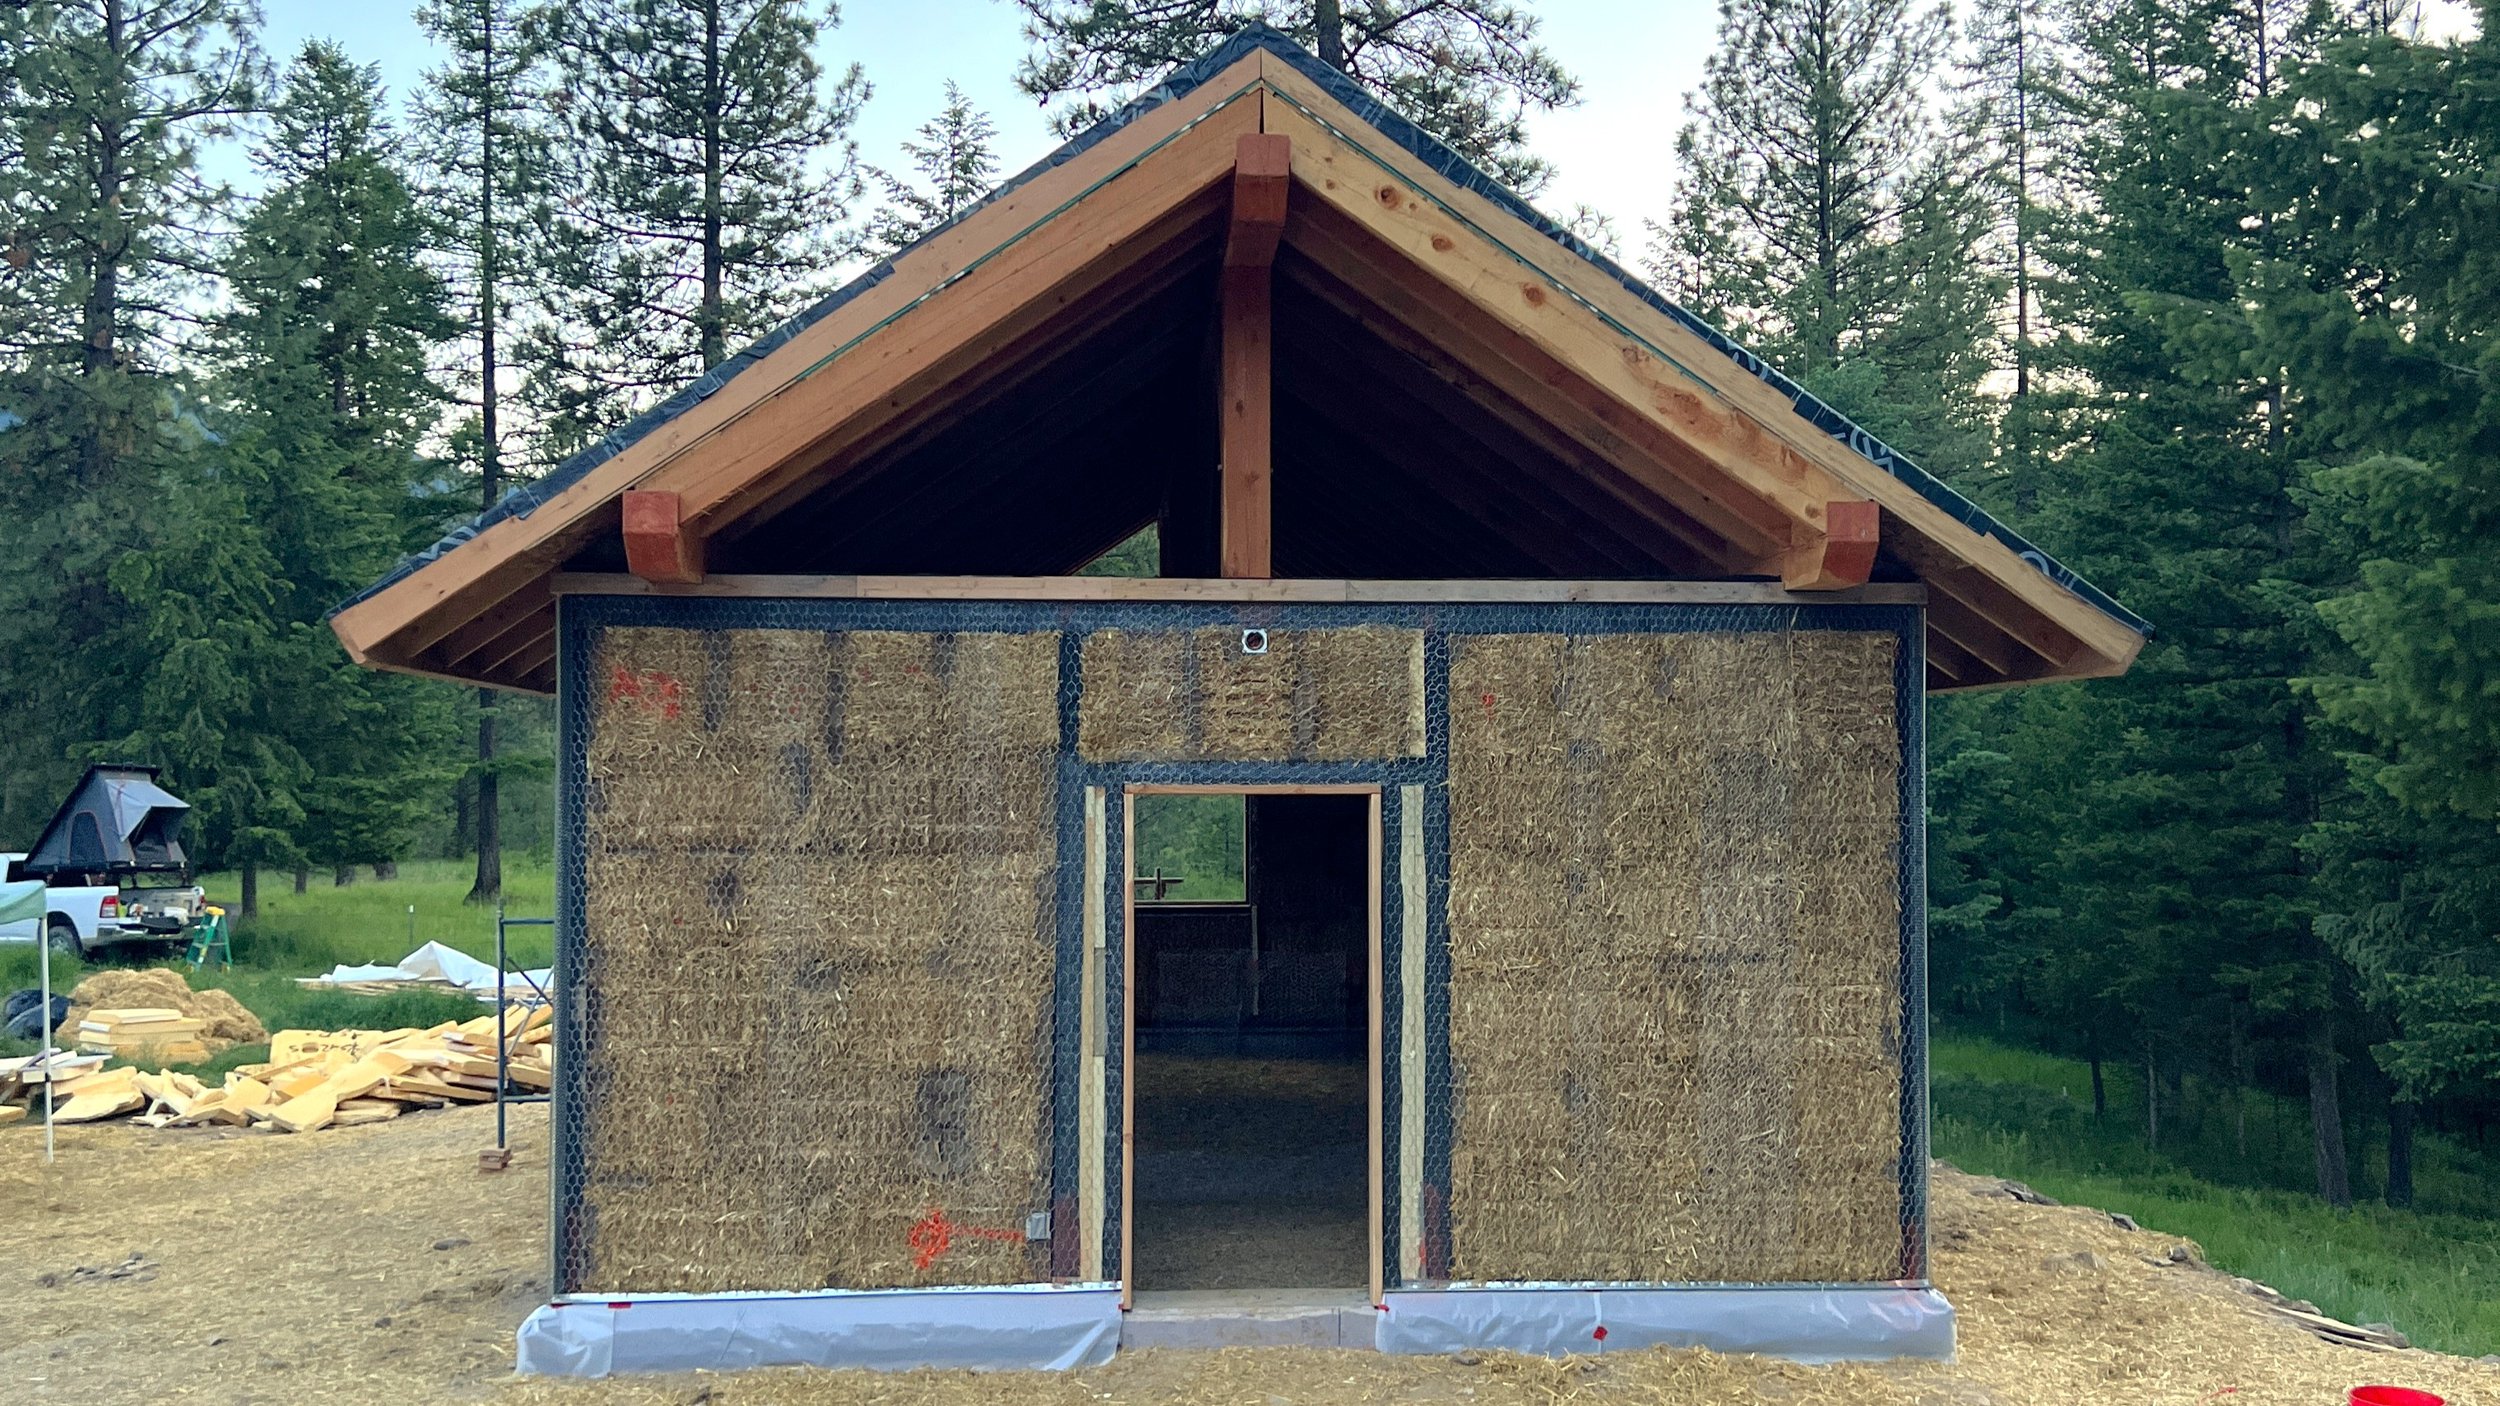
One of the things I enjoy most about straw bale construction is watching the walls go up.
For a long time, a project looks like most other construction. There is a foundation, framing, roof structure, windows, doors, and a lot of familiar building materials. Then the straw bales arrive, and in a short period of time the building changes.
The walls become thick. Window openings become deep. Rooms begin to take on the character people associate with a straw bale home.
Once the last bale is installed, though, the walls are not ready for plaster.
There is another important stage in between. We generally call it wall prep or plaster prep.
Wall prep is where we straighten and shape the bale walls, fill gaps, trim loose straw, deal with exposed wood, install plaster stops, and add the mesh and lath required by the particular wall system.
None of these individual tasks are especially complicated. Taken together, they have a big influence on how easily the plaster goes on, how much plaster you use, how the finished walls look, and how well the plaster performs over time.
Start With the Wall Plane
Straw bales are not precision building blocks.
Even good, consistently sized bales have some variation. Add the fitting, notching, retieing, framing, and dozens of hands involved in stacking a wall, and you should expect some movement in the finished surface.
Before doing much else, I like to stand back and look at the wall.
Where does a bale stick out too far? Where does one sit too deep? Is there a belly in the middle of the wall? Does the surface transition smoothly into the framing around a window or door?
This is the time to move the bales.
With a well-compressed wall, individual bales or portions of bales often shift enough to improve the wall plane. A bale sticking too far into the room gets persuaded toward the exterior. A recessed section gets moved outward. The goal is not to make the wall perfectly flat. That would miss some of the beauty of building with straw.
I am looking for a reasonably consistent surface without large humps and depressions.
This work matters because plaster follows the wall beneath it. A large low spot requires a lot more plaster. A pronounced bulge stays a pronounced bulge unless someone corrects it first.
Wall straightening is easier before mesh, lath, and plaster stops begin locking everything into place.
Then Comes the Weed Whacker
One of the more entertaining tools on a straw bale job site is the weed whacker.
Once the wall plane looks good, we trim the surface of the installed bales. Loose pieces and long strands of straw tend to stick out from the faces of the wall. Running a weed whacker across the surface removes much of this material and leaves a more consistent surface for the plaster work ahead.
There is a balance here.
You are not trying to carve the bales smooth. The plaster needs the straw surface. Natural plasters develop a mechanical bond with the bales, so there is value in retaining a textured surface into which the first coat of plaster works. The 2024 International Residential Code recognizes the bale surface itself as a form of lath when the wall assembly does not otherwise require reinforcing mesh.
The goal of trimming is to clean up the wall, not polish it.
It is also another opportunity to shape areas around windows, doors, corners, and other places where you want the finished wall to have a particular character.
Fill the Holes Before You Cover Them
Once you start looking carefully at a bale wall, you will find holes.
Some are small spaces between bales. Others occur beside posts, under window bucks, around odd framing conditions, or where a bale did not quite fit the space available.
Deal with them now.
Depending on the size and location, I might use tightly bundled straw, cob, light-straw clay, or another appropriate material. The important part is creating a firm backing for the plaster rather than leaving an unsupported cavity behind it.
I prefer doing as much of this work as possible before installing mesh. Stuffing a hole through welded wire mesh is possible. It is also an excellent way to make an easy job more annoying than necessary.
I also do not want someone loosely pushing handfuls of straw into every depression they see. The material needs enough density and support to stay where you put it.
Run your hands over the wall. Push on questionable areas. Look around window and door openings. Pay attention to transitions between straw and framing.
If something feels hollow or unsupported now, plaster will not improve it later.
Wood Needs Different Treatment
Straw provides an excellent surface for natural plaster. Wood does not behave the same way.
Wood expands and contracts as moisture and environmental conditions change. Plaster moves differently. If plaster bonds directly across a wood-to-straw transition, cracking often develops along that change in material.
For this reason, wood buried behind the plaster typically gets covered with roofing felt or another appropriate building paper.
The felt acts as a slip layer between the wood and plaster. It also helps isolate the wood from moisture held by wet plaster during installation or absorbed by the plaster later.
This applies to wood posts, window and door framing, bucks, beams, plates, plywood edges, and other wood surfaces intended to disappear beneath the plaster.
The important distinction is wood behind the plaster. Exposed wood trim or timber that the plaster terminates against gets treated differently.
Give the Plaster Somewhere to Stop
Plaster also needs defined edges.
Around some windows and doors, at the bottom of exterior walls, against exposed wood, or where a plastered wall terminates, we often install J-channel, casing bead, or another type of plaster stop.
These small pieces do several jobs.
They establish the edge of the plaster. They give the plasterer something solid to work toward. They help create clean transitions between materials. In some locations, they also help close potential air pathways where plaster might otherwise shrink away from adjoining framing.
Their location also influences the finished appearance.
Move a plaster stop half an inch, and you have changed the thickness or relationship of the finished wall to a window frame, timber, or piece of trim.
This is why wall prep involves more than getting ready for mud. You are making some of the final aesthetic decisions about the wall.
Mesh and Lath Do Different Jobs
Mesh and plaster lath often get lumped together, but I think of them differently.
Welded wire mesh covers larger areas of the bale wall in wall systems where reinforcement is part of the structural or plaster design. When used, it needs to stay tight against the bales rather than floating away from the wall. Plaster should work into the straw, with the mesh reinforcing the plaster assembly, rather than hanging on loose wire.
Mesh is not automatically required on every straw bale wall. The current IRC allows plaster directly on bales without supplemental lath or mesh unless the wall needs it for structural or out-of-plane resistance. Your engineer, building details, plaster system, and local code requirements should determine what belongs in your wall.
Plaster lath, sometimes called diamond lath, expanded metal lath, or blood lath, serves a more localized purpose.
I use it where plaster needs additional support, especially over wider areas of wood and at transitions between wood and straw. It is also useful for forming curves, window and door returns, niches, and other shapes where the straw alone does not provide enough backing.
A common guideline in our wall-prep process is that narrow areas of wood may be adequately supported by felt and mesh, while wider areas need plaster lath as additional backing. Horizontal surfaces, such as the top of a deep window opening, deserve particular attention because wet plaster has gravity working against it.
This is one of those places where a little extra work before plaster makes the plasterer's job much easier.
Wall Prep Is Also Where the Wall Gets Its Character
Much of wall prep sounds technical when written as a list.
Straighten the bales.
Trim the wall.
Fill the holes.
Install felt.
Set the plaster stops.
Add mesh and lath.
On the job site, though, something else is happening at the same time.
The wall is taking its final shape.
This is when you decide how soft the edges of a window opening will feel. You refine curves. You clean up transitions. You decide where you are comfortable letting the natural irregularity of the straw show and where the wall needs more control.
I do not want straw bale walls to look as though someone tried to make them drywall.
Part of their appeal is the thickness, softness, and slight variation in the surface. Wall prep gives us an opportunity to keep that character while eliminating the irregularities that make plastering difficult or compromise durability.
Do the Work Before the Plaster Crew Arrives
There is a temptation toward the end of bale installation to feel as though the walls are finished.
They look like walls. The openings are there. The building finally has the warmth and character you have been waiting to see.
But plaster prep deserves its own place in the construction schedule.
A wall that has been carefully straightened, trimmed, stuffed, detailed, and reinforced gives the plaster crew a solid starting point. They spend their time plastering instead of correcting the bale installation beneath them.
And once the plaster goes on, most of this work disappears.
You will no longer see the roofing felt, lath, mesh, bundled straw, or all the little adjustments made to individual bales.
You will see the result.
A well-shaped straw bale wall with clean transitions, deep openings, soft curves, and a plaster finish that has the support it needs to do its job.
Want to Learn Wall Prep Hands-On?
Wall prep is a significant part of our workshops. You will work on real straw bale walls, learn the details that prepare them for plaster, and gain experience you can take to your own project.
Join us at an upcoming workshop and learn by doing.